隧道代理(全球HTTP)-产品介绍
## 1 产品简介
**全球HTTP均不支持在中国大陆地区网络环境下使用**
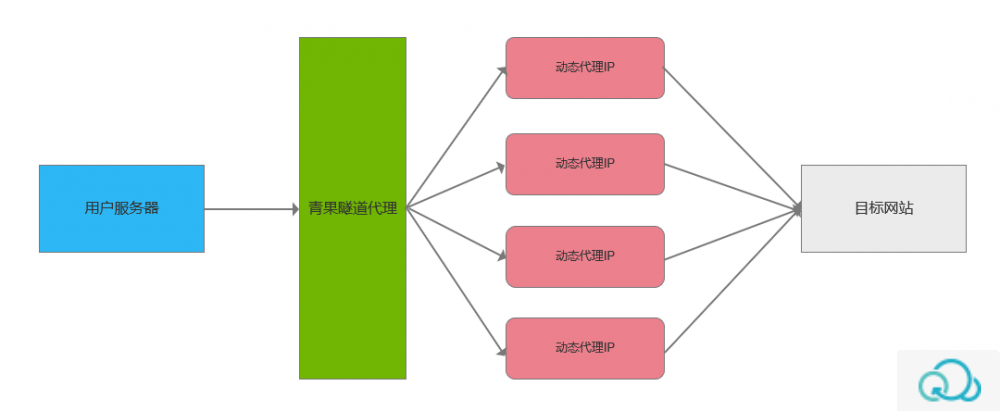
隧道代理(全球HTTP)是利用高性能主机构建的动态代理服务器,通过将切换IP的操作放到云端,自动管理用户发出的隧道请求,实现云端自动切换IP转发用户请求,简化用户的操作,降低了用户的时间成本;
隧道代理使用简单,开发者接入隧道服务即可,参照 [代码样例 ](https://www.qg.net/list/192.html)可集成到您的程序中,极大简化了编程的复杂度。
## 2 资源池
隧道代理产品为用户提供了超级机房池、住宅池两种IP资源池选择。
- 超级机房池:覆盖全球100+国家地区,IP集中管理更加稳定,性价比高。
- 住宅池:覆盖全球200+国家地区,日去重数大1000W+,拥有更高的业务成功率。
更详细的资源池介绍,请点击查看>>[超级机房池](https://www.qg.net/doc/product/6_260_282/2272.html)、[住宅池](https://www.qg.net/doc/product/6_260_282/2273.html)
## 3 付费模式
超级机房池提供按流量和按请求数两种计费模式。
住宅池资源目前都按使用流量付费。
## 4IP存活时长
每一个请求随机一个IP。
## 5 产品优势
- 无须提取IP,方便快捷;
- 支持高并发,不限制并发请求数量
- 提供可视化监控统计,帮助用户精准把控请求频率和请求流量走势,提升业务运行的成功率;
- 完美匿名本机IP,避免不必要的网络攻击,提升业务成功率。
- 云端切换IP,连接上我们的隧道代理服务器后,统一入口,随机动态出口IP,无需手动切换 ;
- 隧道代理可用性>99%,若转发的IP不可用,隧道代理会自动再转发到1个新的可用IP,可连续使用;
- 同时支持Http/Https和Socks协议;
- 响应极速,毫秒级更换代理IP(访问百度测试,响应时间<1秒);
- 支持多台设备或进程同时进行。
## 6 产品属性
- 免费白名单数量:256
- 支持协议:HTTP/HTTPS/SOCKS5
- 单IP带宽限制:无限制
- 终端数限制:无限制
##7 用途
**隧道代理(全球HTTP)可用于:**
- 征信查询
- 原创版权保护
- 电商选品
- 舆情监测
**不适用于以下场景**
- 大文档、音乐、视频等大文件下载;
- 登录和访问色情、赌博等不健康的网站;
- 用于网络攻击等违法行为。
## 8 使用指南
隧道代理最主要的使用方式是编程使用,无须提取IP,对接隧道服务即可。
[隧道代理(全球HTTP)开发者指南 ](https://www.qg.net/doc/product/6_260_279/1942.html )
## 9 产品购买
- [短效代理(全球HTTP)](https://www.qg.net/business/proxyip.html?region=overseas&product_type=1&pool_type=11&extract_mode=2&spec_idx=0&num_idx=0&time_idx=0&number=1&authkey_type=0 )
- [隧道代理(全球HTTP)](https://www.qg.net/business/proxyip.html?region=overseas&product_type=3&pool_type=11&extract_mode=1&spec_idx=0&num_idx=0&time_idx=0&number=1&authkey_type=0)
短效代理(全球HTTP)-产品介绍
## 1 产品简介
**全球HTTP均不支持在中国大陆地区网络环境下使用**。
短效代理(全球HTTP)提供全球100+个国家地区的海量IP资源,日去重量达到400万+。为您提供高质、可靠、稳定的代理服务,适用于公开数据采集的场景,助力企业融入数字经济发展浪潮。
在青果强大的技术支撑下,支持客户使用HTTP、HTTPS、Socks5 三大协议,多种语言脚本,保证您快速连接。
短效代理(全球HTTP)为用户提供了通道提取和按量提取两种方式,您可以从中选择适合自己业务的模式。
全球短效代理产品的使用非常方便,只需要几分钟,您可以通过编程使用或手动设置代理IP进行使用。
## 2 提取方式
为满足不同用户的使用需求,全球HTTP-短效代理提供了2种不同的IP提取方式。
- [按量提取](https://www.qg.net/doc/product/6_259_283/2274.html):【按使用的流数计费】适合流量使用不固定的应用场景
- [通道提取](https://www.qg.net/doc/product/6_259_283/2275.html):【按同时在线的IP数计费】适用于对流量使用量较大的应用场景
↑点击以上蓝字,查看该提取方式详情介绍(包含对应的套餐/IP存活时长介绍)。
不同的提取方式决定了不同计费方式,具体价格情况以购买页为准。
## 3 产品优势
- 存活周期丰富,通道提取可选5-60分钟,按量提取可选1-3分钟,灵活适配用户需求;
- 支持高并发,不限制并发请求数量;
- 完美匿名本机IP,避免不必要的网络攻击,提升业务成功率。
- 可用性>99%,设置中转IP,保障可连续使用;
- 支持账密&白名单两种鉴权方式,白名单IP最多支持256个;
- 极速(访问百度测试,响应时间<1秒);
- IP存活时长到期后系统自动释放,无需手动释放;
- 提供代理请求统计,包括请求频率、请求错误分析,帮助您自主排查,提升程序运行的成功率;
- 提供IP提取、IP使用监控,精准回溯每一次的提取与使用记录;
## 4 产品属性
- 免费白名单数量:256
- 支持协议:HTTP/HTTPS/SOCKS5
- 单IP最大连接数:100
- 单IP带宽限制:2Mbps
- 终端数限制:无限制
- 提取资源频率:通道提取为 (通道数*5+10 ) 次/分钟,按量提取为60次/分钟
- 单次提取IP上限:按量提取方式为200个,通道提取方式为100个
## 5 用途
**短效代理(全球HTTP)可用于:**
- 市场调研
- 品牌及版权保护
- 数据抓取和索引
- 跨境电商选品
- 夺取竞争对手情报
- SEO监控
**不适用于以下场景**
- 大文档、音乐、视频等大文件下载;
- 登录和访问色情、赌博等不健康的网站;
- 用于网络攻击等违法行为。
## 6 使用指南
短效代理(全球代理)使用非常方便,您可以选择①手动设置代理IP并在浏览器中使用,
也可以通过②API接口获取代理并参照代码样例集成到您的程序中。
具体请查看
- [手动设置代理指南 >](https://www.qg.net/doc/product/6_259_280/2264.html)
- [开发者使用代理指南 >](https://www.qg.net/doc/product/6_259_280/2137.html)
## 7 产品购买
- [短效代理(全球HTTP)](https://www.qg.net/business/proxyip.html?region=overseas&product_type=1&pool_type=11&extract_mode=2&spec_idx=0&num_idx=0&time_idx=0&number=1&authkey_type=0 )
- [隧道代理(全球HTTP)](https://www.qg.net/business/proxyip.html?region=overseas&product_type=3&pool_type=11&extract_mode=1&spec_idx=0&num_idx=0&time_idx=0&number=1&authkey_type=0)
常见产品问题
## 代理IP的来源稳定吗?
青果网络自研代理IP服务,采用分布式架构,代理IP节点遍布全国各地,IP覆盖范围广,IP质量稳定。
## 你们都有哪些地区的代理?
我们实时可用的开放代理覆盖中国国内大部分城市,200多个不同省市地区。
## 可以指定城市地区和ISP运营商线路吗?
-可以根据邮编来获取指定某个城市的IP地址,详细获取指定地区的格式可以查看文档:[区域编码>>](https://www.qg.net/doc/1799.html)
-目前支持的地区及运营商可通过提供的API接口进行实时查询,接口请求地址: https://proxy.qg.net/resources
-或通过调试工具进行查询,调试工具地址 https://www.qg.net/tools/IPdebug.html
-参数注释:
- AreaId:城市的ID(数值与各地邮政编码一致),获取指定地区IP需要提交该参数;
- AreaName:城市名称,主要在查询的时候展示用,获取指定地区IP不需要提交该参数;
- Isp:运营商线路编号,1=电信,2=移动,3=联通,获取指定运营商IP需要注明参数值;
- IspName:运营商的线路名称,查询时展示用,获取指定运营商IP时不需要提交该参数;
- Status:状态值,1=可用,0=不可用。
详情可见API帮助文档 https://www.qg.net/list/160.html
## 代理IP可以做什么?
代理IP的作用很简单,隐藏真实IP,转发请求。代理IP的应用领域很广泛,可以在很多业务场景中得到应用。
短效代理、隧道代理IP时效性不长,短时间内可获取大量IP。可适用于隐藏网页IP,一般常用于数据爬取、投票、网购、空间留言、论坛顶帖、帐号注册、刷网站流量、网赚任务等,最适合需要频繁更换IP的客户;
长效代理、独享代理IP时效性长,IP稳定,可适用于重度网页访问/爬虫、观看视频或玩游戏等;
## HTTP、HTTPS、Socks5协议的区别?
Http代理和https代理的区别具体如下:
- 无论是http代理还是https代理,都支持同时代理访问http和https网站;
- http代理和https代理里的http和https和你访问的网站是否是http(https)是无关的;
- http代理:客户端和代理服务器之间是tcp传输数据;
- https代理:客户端和代理服务器之间是tls加密传输数据;
- http代理是使用最广泛的代理,大部分客户端都不支持https代理。
## 短效代理、独享代理、隧道代理、长效代理有什么区别?我该如何选择?
[点击此处](https://www.qg.net/doc/2245.html),查看国内代理4种产品的区别
## 什么是IP白名单?为什么要设置IP白名单?
为了保证您购买的代理IP业务只有您的服务器才能使用,我们采用了IP白名单机制;
也就是通过设置IP白名单指定您的服务器IP,除了您指定的IP外,其他IP不能使用该代理IP业务。
每个代理IP业务总共可添加的IP白名单数量是256个,购买后您有多台独立外网IP的机器可以同时使用代理IP业务。
如何查看机器的外网IP?
- 如果是办公室电脑,可以访问https://ip.cn/api/index?ip=&type=0 查询您的外网IP ;
- 如果是Linux服务器,可以通过如下命令查看机器外网IP:`curl myipip.net` ;
## 为什么隧道代理不需要获取IP?
因为隧道代理是云端自动更换IP,所以不需要用户手动更换IP,也就不需要获取IP。隧道代理会将用户发送的请求转发到不同的代理IP,转发周期可按需指定。
## 通道数、请求数、终端数分别是什么意思?
- 通道数: 通道数表示同时可使用IP数,如一通道表示同一时间内最多可提取使用1个IP;
- 请求数: 请求数表示同时可使用的IP请求数;
- 终端数:表示多少台终端设备。
## 高匿名、匿名和透明代理有什么区别?
### 1 透明代理
使用透明爬虫代理,对方服务器可以知道你使用了代理,并且也知道你的真实IP。
透明爬虫代理访问对方服务器所带的HTTP头信息如下:
```
REMOTE_ADDR = 代理服务器IP
HTTP_VIA = 代理服务器IP
HTTP_X_FORWARDED_FOR = 你的真实IP
```
### 2 匿名爬虫代理
匿名爬虫代理隐藏了你的真实IP,但是向访问对象透露了你是使用代理服务器访问他们的。
### 3 混肴代理
```
REMOTE_ADDR = Proxy IP
HTTP_VIA = Proxy IP
HTTP_X_FORWARDED_FOR = Random IP address
```
如上,与匿名代理相同,如果使用了混淆代理,别人还是能知道你在用代理,但是会得到一个假的IP地址,伪装的更逼真。
### 4 高匿名代理
使用高匿名代理,对方服务器不知道你使用了代理,更不知道你的真实IP。
高匿名爬虫代理访问对方服务器所带的HTTP头信息如下:
```
REMOTE_ADDR = 代理服务器IP
HTTP_VIA 不显示
HTTP_X_FORWARDED_FOR 不显示高匿名爬虫代理隐藏了你的真实IP,同时访问对象也不知道你使用了代理,因此隐蔽度最高。
```
独享代理-产品介绍
## 1 产品简介
独享是用户独享带宽和IP资源,IP稳定不易掉线,带宽峰值高达**5Mbps**,极速响应;一人独享IP池,保障IP纯净度与业务成功率;节点广,可自由选定IP地区和存活时长,支持多机器或多进程使用代理IP,灵活满足业务需求;
独享代理使用非常方便,只需几分钟,您就可以通过[API链接](https://www.qg.net/tools/IPget.html?type=2-1)获取代理IP并参照[代码样例](https://www.qg.net/list/192.html)集成到您的程序中。
## 2 产品优势
- IP存活时长≤24H,IP存活30秒后可释放申请新的IP,可根据需求,自主控制IP时长;
- 独享带宽和IP,能有效的保证IP的纯净度和业务的成功率;
- 5Mbps带宽,高速、不限流量;
- 提供代理请求统计,包括请求频率、请求错误类型等,帮助自主排查,提升程序运行的成功率;
- 提供IP提取监控,精准回溯每一次的提取记录;
- 极速(访问百度测试,响应时间<1秒)
- 支持多台设备或多个进程同时进行
- 覆盖全国主要省份
- 支持指定获取某个城市IP或全国随机
## 3 适合人群
独享代理适用于对IP质量要求较高或对带宽要求较高的业务场景。
## 4 计费模式
目前仅支持按时计费模式,包括按周、按月、按年三种按时付费模式
## 5 产品属性
- 免费白名单数量:256
- 支持协议:HTTP/HTTPS/SOCKS5
- 单IP最大连接数:1000
- 带宽峰值:5Mbps
- 终端数限制:无限制
- 提取资源频率: (通道数*5+10 ) 次/分钟
- 单次提取IP上限:100个
## 6 用途
**独享代理可用于:**
- 广告检测
- 征信查询
- 直播/短视频数据监控分析
- SEO检测
**不适用于以下场景**
- 访问谷歌等国内正常无法访问的网站;
- 大文档、音乐、视频等大文件下载;
- 登录和访问色情、赌博等不健康的网站;
- 用于网络攻击等违法行为。
## 7 使用指南
独享代理使用非常方便,您可以选择①**手动设置**代理IP并在浏览器中使用,
也可以通过②**API接口获取**代理并参照代码样例集成到您的程序中。
具体请查看
- [手动设置代理指南 >](https://www.qg.net/doc/product/6_257_270/2266.html)
- [开发者使用代理指南 >](https://www.qg.net/doc/product/6_257_270/1794.html)
##8 产品购买
- [短效代理 >](https://www.qg.net/business/proxyip/2.html?region=domestic&product_type=1&pool_type=2&extract_mode=4&spec_idx=0&num_idx=0&time_idx=3&number=1000&authkey_type=0 )
- [隧道代理 >](https://www.qg.net/business/proxyip/42.html?region=domestic&product_type=3&pool_type=1&extract_mode=1&spec_idx=0&num_idx=0&time_idx=3&number=5&authkey_type=0 )
- [独享代理 >](https://www.qg.net/business/proxyip/6.html?region=domestic&product_type=2&pool_type=1&extract_mode=1&spec_idx=0&num_idx=0&time_idx=2&number=1&authkey_type=0)
- [长效代理 >](https://www.qg.net/business/proxyip/6.html?region=domestic&product_type=4&pool_type=1&extract_mode=1&spec_idx=0&num_idx=0&time_idx=2&number=1&authkey_type=0 )
测试代理的可用性
## 1 概述
短效代理、独享代理和长效代理通过API获取代理IP后,您就可以在程序里通过代理服务器获取网页数据。
隧道代理无需调用API获取代理,在【[会员中心](https://www.qg.net/user)】查看隧道的IP和端口号,对接隧道服务即可。
独享代理(地区锁)则需要在业务操作列表通过【IP管理】去添加城市线路和拨号IP获取代理IP,并保持城市线路不变。
您获取的代理IP是这样的:`122.96.59.105:23068`
`122.96.59.105` 是代理服务器的IP地址;
`23068` 是代理服务器的端口号。
## 2 代理验证
使用短效代理、独享代理和长效代理的IP需要进行授权验证,购买后只有通过您的用户名密码或设置白名单验证后才能使用。
隧道代理则是接入青果隧道服务器即可,隧道服务验证方式同样支持用户名密码(Authkey和Authpwd)和白名单验证;
需要注意的是,白名单的添加需在未提取IP前添加;短效代理产品的不同key,不能添加相同的白名单IP。
我们支持两种验证方式:
### 2.1 绑定您机器的IP作为白名单
如果是办公室电脑,可以访问[https://ip.cn/api/index?ip=&type=0](https://ip.cn/api/index?ip=&type=0)查询您的外网IP;
如果是Linux服务器,可以通过如下命令查看机器外网IP:`curl https://d.qg.net/ip`
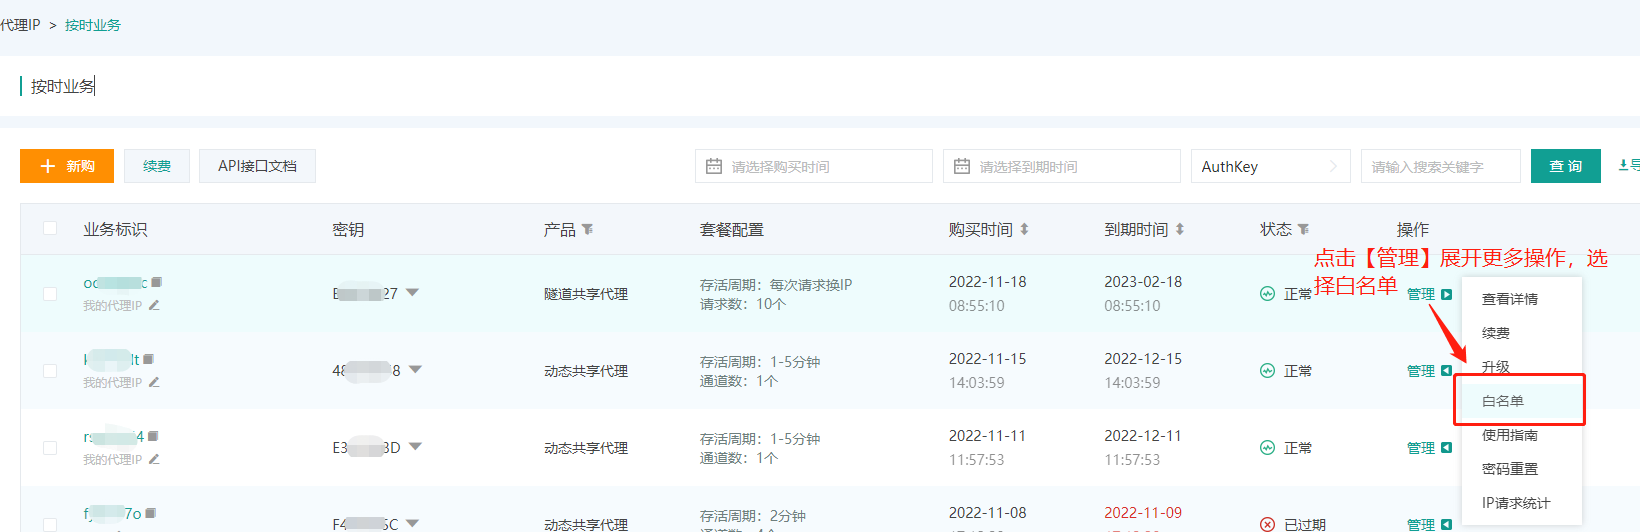
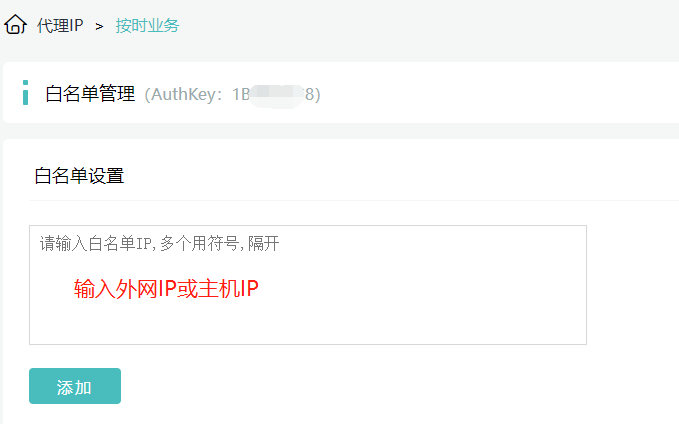
进入会员中心,找到您所在的业务,管理【白名单】,包括添加删除白名单,白名单设置详情如下图:
### 2.2 帐密验证
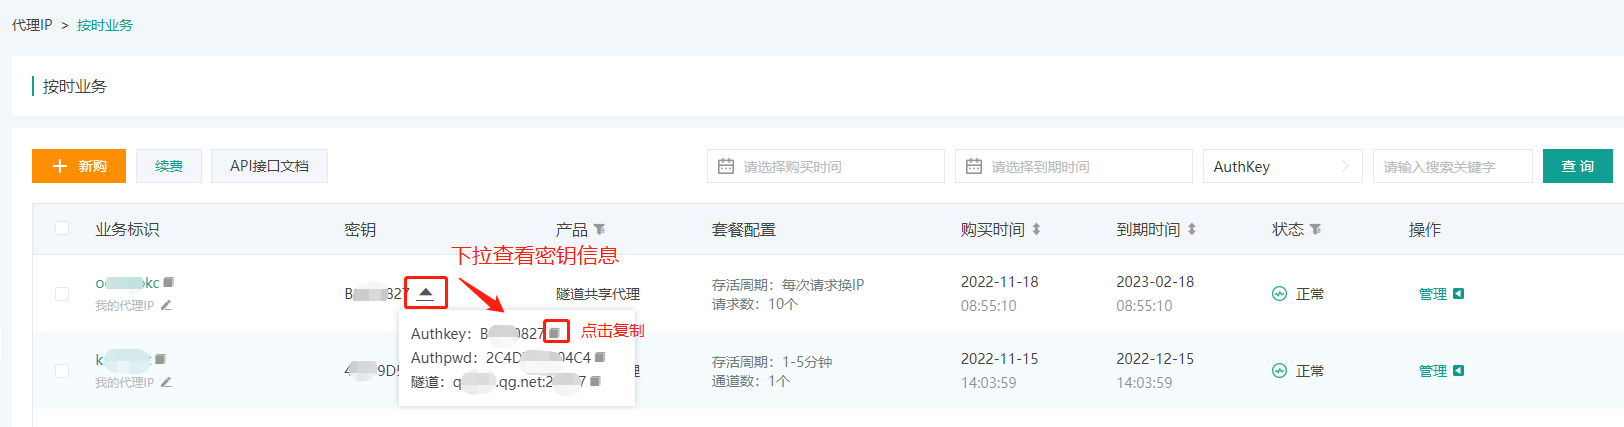
进入【会员中心】,在您所在的代理IP业务找到用于代理IP验证的用户名密钥信息(Authkey和Authpwd)。
**HTTP代理**
通过用户名密码的进行身份认证,格式如下:
```
curl -x http://{key}:{passwd}@{ip}:{port} {targetUrl}
```
Http/Https代理,-x 填写的协议头只能是Http,不能是Https,如果填写下面那样的格式,将无法访问
```
curl -x https://{ip}:{port} {targetUrl}
```
**Socks代理**
```
curl -x socks5://{ip}:{port} {targetUrl}
```
curl返回的是未渲染的html内容,这属于正常现象,请参见[代码样例](https://www.qg.net/list/192.html)。
### 2.3 命令行测试
如果您的程序在Linux上运行,我们非常推荐您在命令行下先通过`curl`命令测试代理服务器的可用性,然后再进行编程。
例如您的用户名是`authkey`,密码是`authpwd`,提取到的代理IP是`118.92.69.112:32105`,IP白名单是`36.90.191.92:32140`,可执行如下命令测试代理可用性:
Http/Https代理,帐密模式
```
curl -x http://{authkey}:{authpwd}@{118.92.69.112}:{32105} {targetUrl}
```
Http/Https代理,白名单模式
```
curl -x http://{36.90.191.92}:{32140} {targetUrl}
```
##3 代码样例
- [代码示例 - Java](https://www.qg.net/doc/1698.html "代码示例--Java")
- [代码示例 - PHP](https://www.qg.net/doc/1696.html "代码示例--PHP")
- [代码示例 - Python](https://www.qg.net/doc/1697.html "代码示例--Python")
- [代码示例 - GO](https://www.qg.net/doc/1695.html "代码示例--GO")
- [代码示例 - C语言](https://www.qg.net/doc/1694.html "代码示例--C语言")
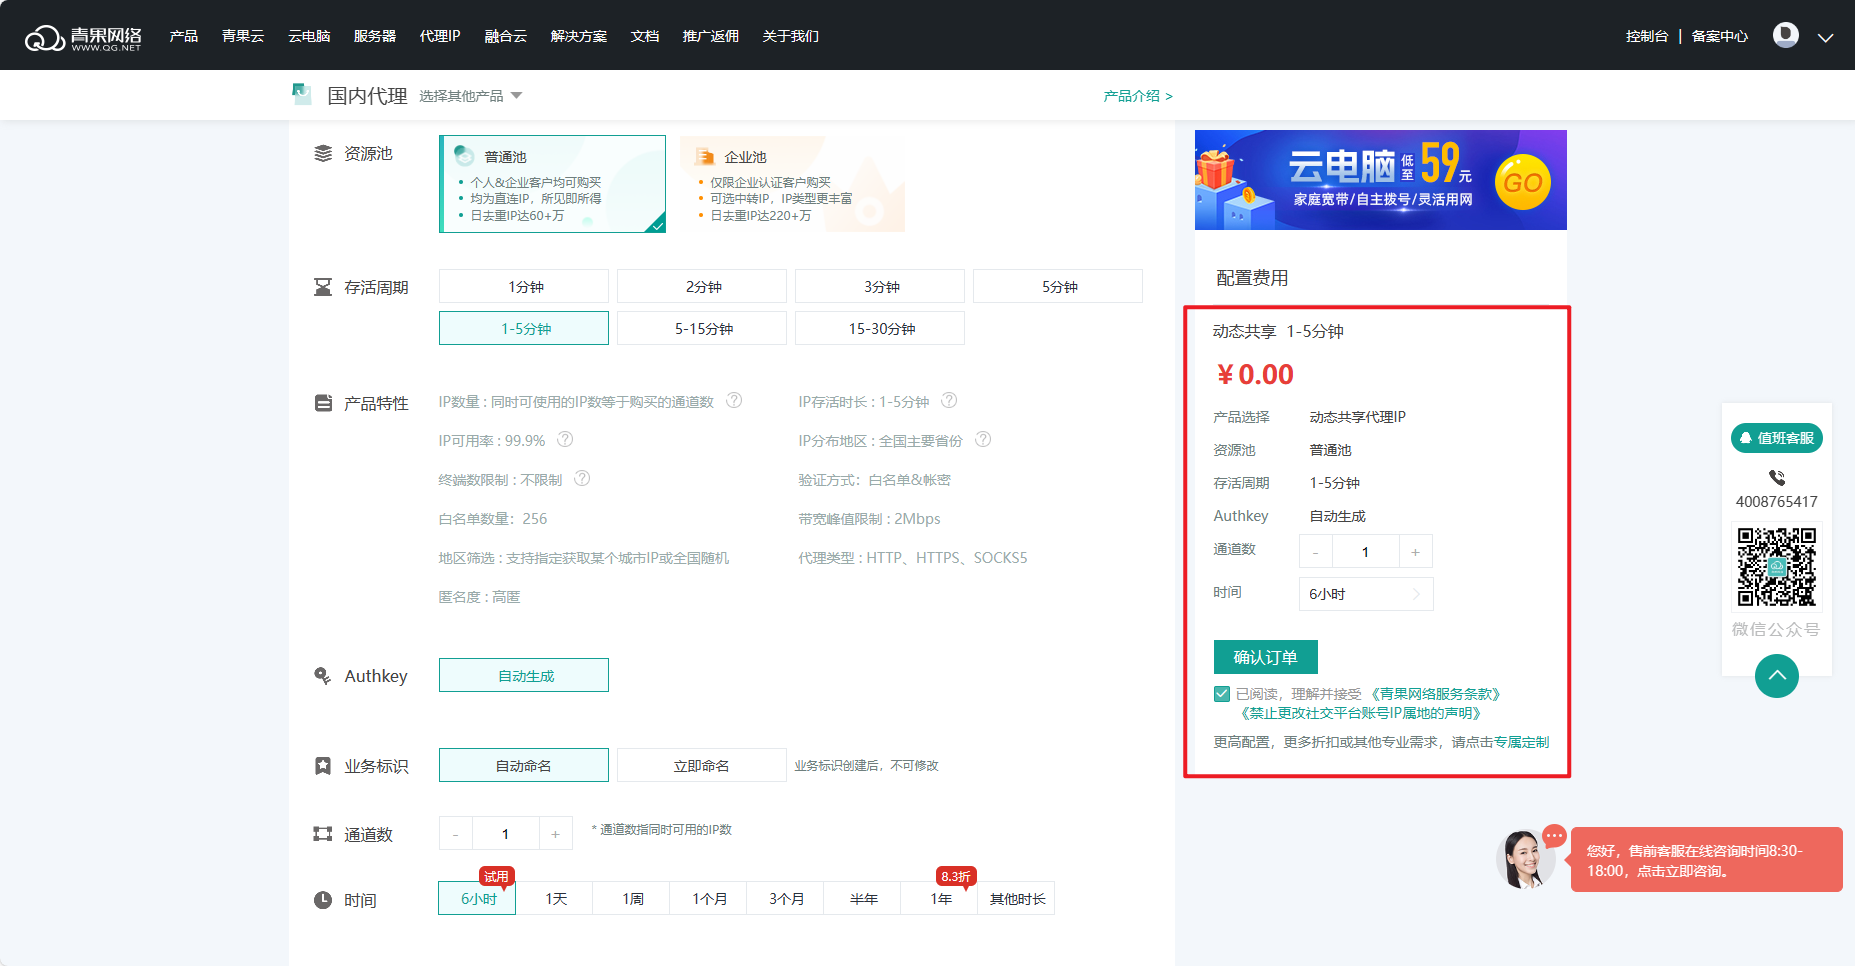
可以免费试用吗?
为了方便新用户更好地了解和使用我们的代理IP产品,我们为新注册用户提供免费试用。
**免费试用规则**
**1.适用产品**:
目前代理IP产品除按量提取类型的产品暂不支持试用之外,其他代理产品皆有免费试用机会。
即,可进行免费试用的产品有:
国内代理IP中,按时购买的短效代理/独享代理/隧道代理/长效代理IP,皆有免费试用6小时的套餐。
全球HTTP中,按通道提取的短效代理产品,可选择免费试用2小时。
**2.获取条件**
新用户在注册后完成实名认证,并关注“青果网络”微信公众号,即可获得免费试用资格。
实名认证链接:https://www.qg.net/user/auth/result.html

扫码关注【青果网络QGNET】微信公众号
**3.免费试用次数**
每位完成认证+关注的新用户,都有3次免费试用机会。
用户可在适用产品下任意选择配置,0元下单试用套餐,进行测试使用。
注册通道:[立即注册](https://www.qg.net/register)
免费试用产品传送门:
[国内代理 | 短效代理 >](https://www.qg.net/business/proxyip.html?region=domestic&product_type=1&pool_type=2&extract_mode=4&spec_idx=0&num_idx=0&time_idx=0&number=1000&authkey_type=0)
[国内代理 | 独享代理 >](https://www.qg.net/business/proxyip.html?region=domestic&product_type=2&pool_type=1&extract_mode=1&spec_idx=0&num_idx=0&time_idx=0&number=1&authkey_type=0)
[国内代理 | 隧道代理 >](https://www.qg.net/business/proxyip.html?region=domestic&product_type=3&pool_type=1&extract_mode=1&spec_idx=0&num_idx=0&time_idx=0&number=5&authkey_type=0)
[国内代理 | 长效代理 >](https://www.qg.net/business/proxyip.html?region=domestic&product_type=4&pool_type=1&extract_mode=1&spec_idx=0&num_idx=0&time_idx=0&number=1&authkey_type=0)
[全球HTTP | 短效代理 >](https://www.qg.net/business/proxyip.html?region=overseas&product_type=1&pool_type=11&extract_mode=1&spec_idx=0&num_idx=0&time_idx=0&number=1&authkey_type=0)
获取代理IP
## 1 API调用提取
对于短效代理、独享代理、长效代理,我们都提供了API接口,方便开发者批量获取代理IP。
接口返回数据的格式支持文本、json、xml。
获取IP接口文档:
- [短效代理IP资源提取 >](https://www.qg.net/doc/2255.html)
- [独享代理IP资源提取 >](https://www.qg.net/doc/1840.html)
- [长效代理IP资源提取 >](https://www.qg.net/doc/1863.html)
隧道代理无需调用API提取代理,其他接口参见:[API接口概览](https://www.qg.net/doc/2145.html)
## 2 生成API链接
你可以在【提取工具】或【调试工具】生成API链接在线提取IP,方便集成到您的程序或软件中。
### 2.1 提取工具
选择已购买可用的AuthKey值,根据实际需求提取对应的IP,点击【生成链接】获取在线API链接,【打开链接】新窗口打开获取申请成功的IP信息,如下图所示;


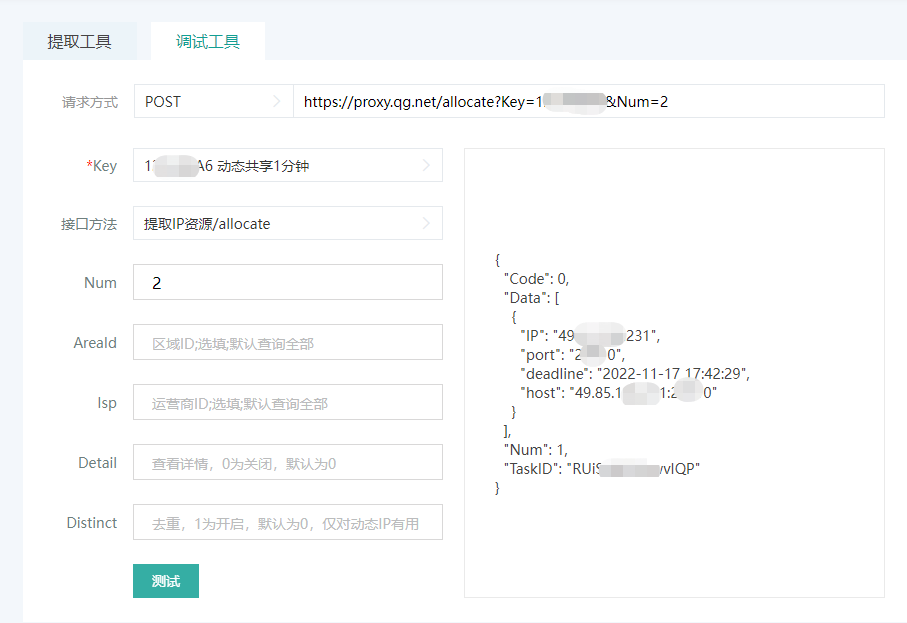
### 2.2 调试工具
首先勾选要进行提取的业务key,key为必选项,是对接接口的必要信息;
其次,选择接口方法,不同的产品可选择的提取接口不同。
短效代理可选择【提取IP资源】、【获取IP池资源】接口,接口【获取IP池资源】是获取IP资源池全部可用的IP,资源池指的是购买短效代理的多通道形成的小资源池;
独享代理提取接口可选择【提取IP资源】、【更换IP资源】,接口【更换IP资源】是释放IP并申请新的IP;
长效代理提取接口可选择【提取IP资源】;
然后,其他选项IP数量、地区、运营商按需选择,最后点击【测试】按钮即可进行IP提取,申请成功返回结果为如下图所示;
## 3 测试API链接
### 3.1 浏览器测试
您可以把生成的API链接直接在浏览器里打开,查看返回结果。例如,您直接点击如下api链接:
https://proxy.qg.net/query?Key=0B***607
###3.2 命令行测试
如果您在linux系统下,可以通过curl命令请求API链接查看结果:
```
curl "https://proxy.qg.net/allocate?Key=请改成您的Key
```
## 4 接口返回错误码
| 错误码 | 描述 |
| ------------ | ------------ |
| -1 | 未知错误 |
| -10 | 参数不合法 |
| -11 | 请求过于频繁 |
| -100 | 计划不存在或已过期 |
| -101 | 请求数量超过计划通道数 |
| -102 | 没有剩余的可用通道 |
| -103 | 资源不足 |
| -104 | 资源申请失败 |
| -105 | 申请的IP数超过允许申请的IP数 |
每个接口自己的错误码请参见各接口文档。
## 5 代码样例
- [代码示例-Python](https://www.qg.net/doc/81.html)
- [代码示例-Java](https://www.qg.net/doc/82.html)
- [代码示例-PHP](https://www.qg.net/doc/83.html)
长效代理-API接口介绍
## 1说明
通过编码使用长效代理主要有以下4步骤:
1.先在[提取工具](https://www.qg.net/tools/IPget.html)或[调试工具](https://www.qg.net/tools/IPdebug.html)上获取api接口;
2.使用白名单或账密进行授权验证;
3.进行代理测试;[查看测试步骤>>](https://www.qg.net/doc/1574.html "查看测试步骤")
4.参考[代码样例](https://www.qg.net/list/192.html)编写采集程序,使用代理IP。
## 2 API接口
长效代理API接口一览
| 接口类型 | API | 描述 |
| ---------- | ------------------------------------------------------------ | ------------------------------------------------------------ |
| 资源相关 | - [get](https://www.qg.net/doc/product/6_258_274/1863.html)
- [delete](https://www.qg.net/doc/product/6_258_274/1862.html)
- [query](https://www.qg.net/doc/product/6_258_274/1861.html)
- [channels](https://www.qg.net/doc/product/6_258_274/1860.html)
- [resources](https://www.qg.net/doc/product/6_258_274/1859.html)
| - 提取IP资源
- 释放IP资源
- 查询在用IP资源
- 查询通道数
- 查询资源地区
|
| 白名单相关 | -[whitelist/query](https://www.qg.net/doc/180.html "whitelist/query")
- [whitelist/add](https://www.qg.net/doc/178.html "whitelist/add")
- [whitelist/del](https://www.qg.net/doc/179.html "删除白名单")
| - 查询IP的白名单
- 添加IP的白名单
- 删除IP的白名单 |
使用青果网络远程插件登录Linux实例
# 1. 操作场景
本文介绍如何使用青果网络远程插件登录方式登录Linux实例。此处以PuTTY为例。
# 2. 适用本地操作系统
Windows
# 3. 前提条件
- 请先安装好其中一种本地远程工具:
- PuTTY:[立即下载](https://www.chiark.greenend.org.uk/~sgtatham/putty/latest.html)
- SecureCRT:[立即下载](https://www.vandyke.com/products/securecrt/)
- Xshell:[立即下载](https://www.xshellcn.com/xiazai.html)
# 3. 操作步骤
1. 登录[青果网络控制台](https://www.qg.net/user/)
2. 在对应的产品列表页中找到需要登录的业务实例,点击“登录”按钮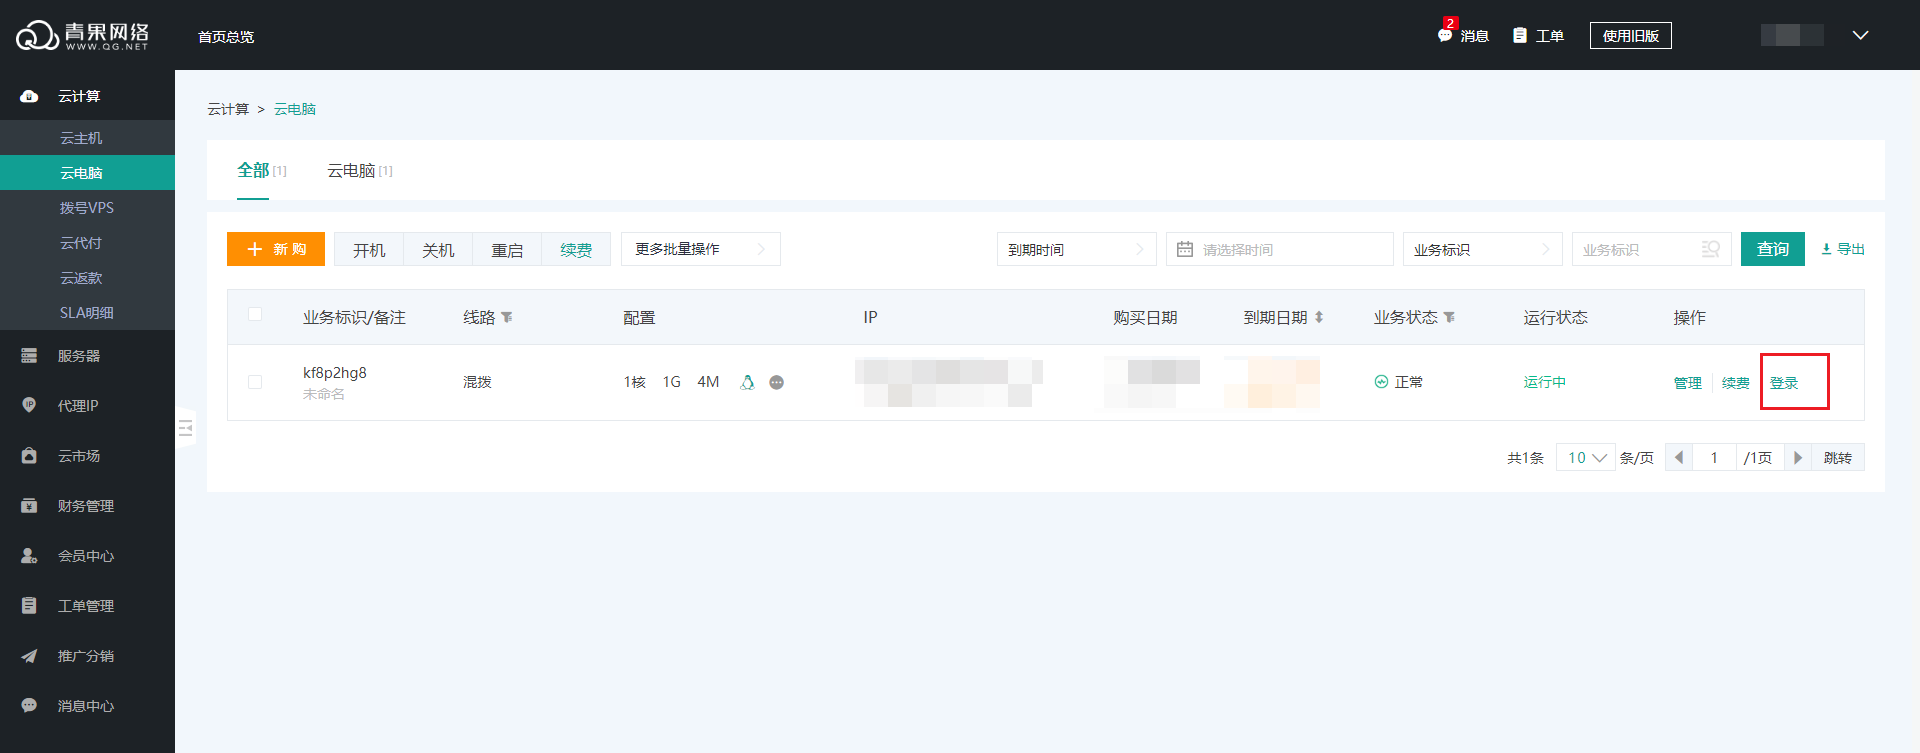
1. 在打开的远程登录窗口中,确认登录信息,并点击“登录”
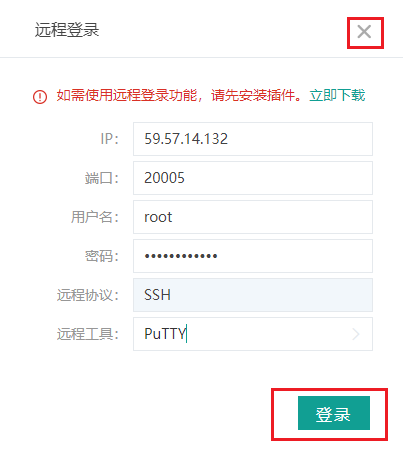
1. 登录信息,系统会预先按照业务信息填写
2. 如果是初次使用,请先下载青果网络远程插件。[立即下载](https://storage.feikua.net/download/cloudremote/青果网络远程插件.zip)
2. 在浏览器中允许打开青果网络远程插件,即可登录成功。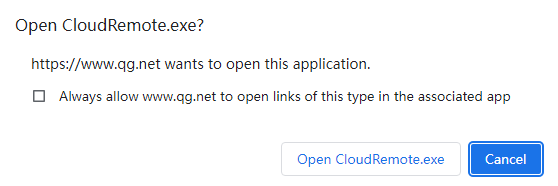
3. 初次使用远程插件时,需要先配置本地工具的路径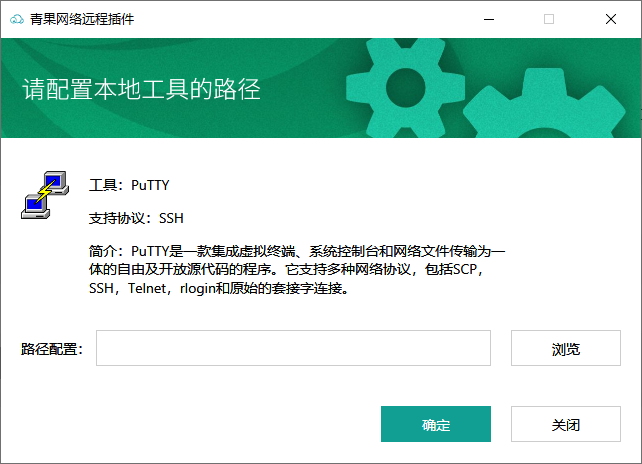
1. 登录成功则出现类似如下图所示界面: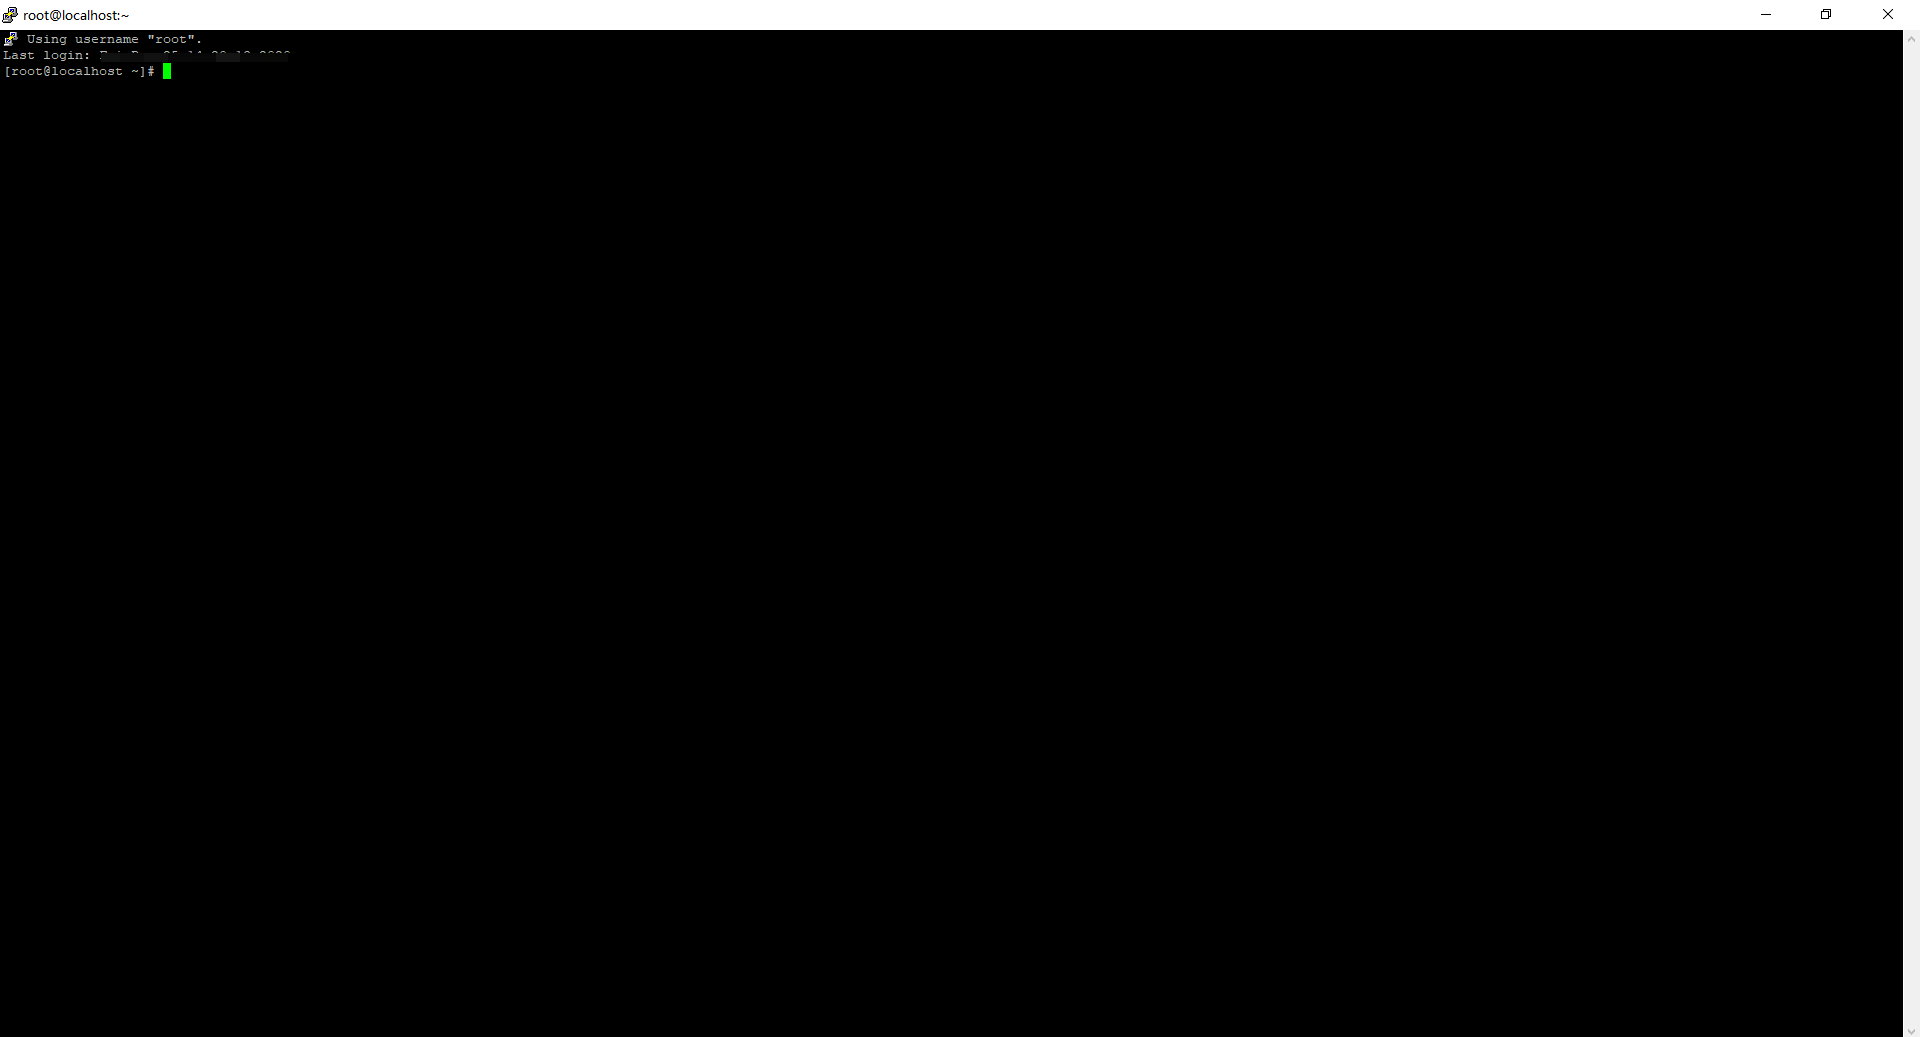
# 4. 常见问题
- 机器刚开通时,需要一定时间开机,请等待机器开机后,再尝试登录
使用青果网络远程插件登录Windows实例
# 1. 操作场景
本文介绍如何使用青果网络远程插件登录方式登录Windows实例。
# 2. 适用本地操作系统
Windows
# 3. 操作步骤
1. 登录[青果网络控制台](https://www.qg.net/user/)
2. 在对应的产品列表页中找到需要登录的业务实例,点击“登录”按钮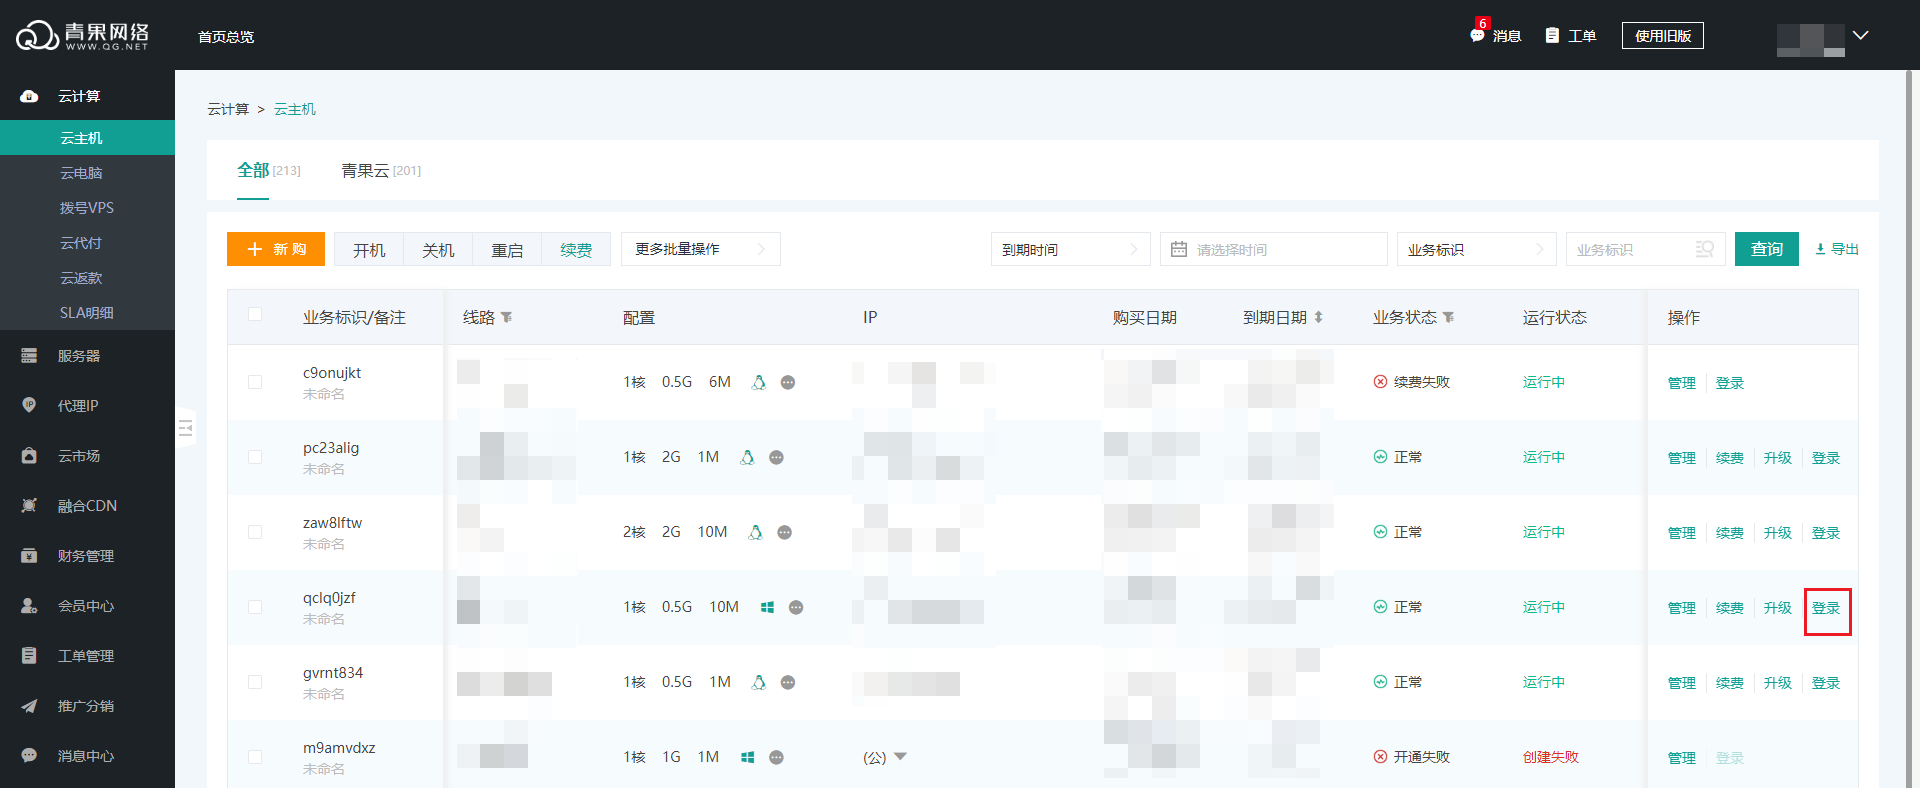
3. 在打开的远程登录窗口中,确认登录信息,并点击“登录”
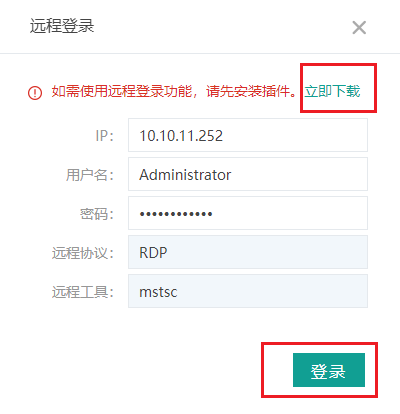
1. 登录信息,系统会预先按照业务信息填写
2. 如果是初次使用,请先下载青果网络远程插件。[立即下载](https://storage.feikua.net/download/cloudremote/青果网络远程插件.zip)
4. 在浏览器中允许打开青果网络远程插件,即可登录成功。
1. 登录成功则出现类似如下图所示界面: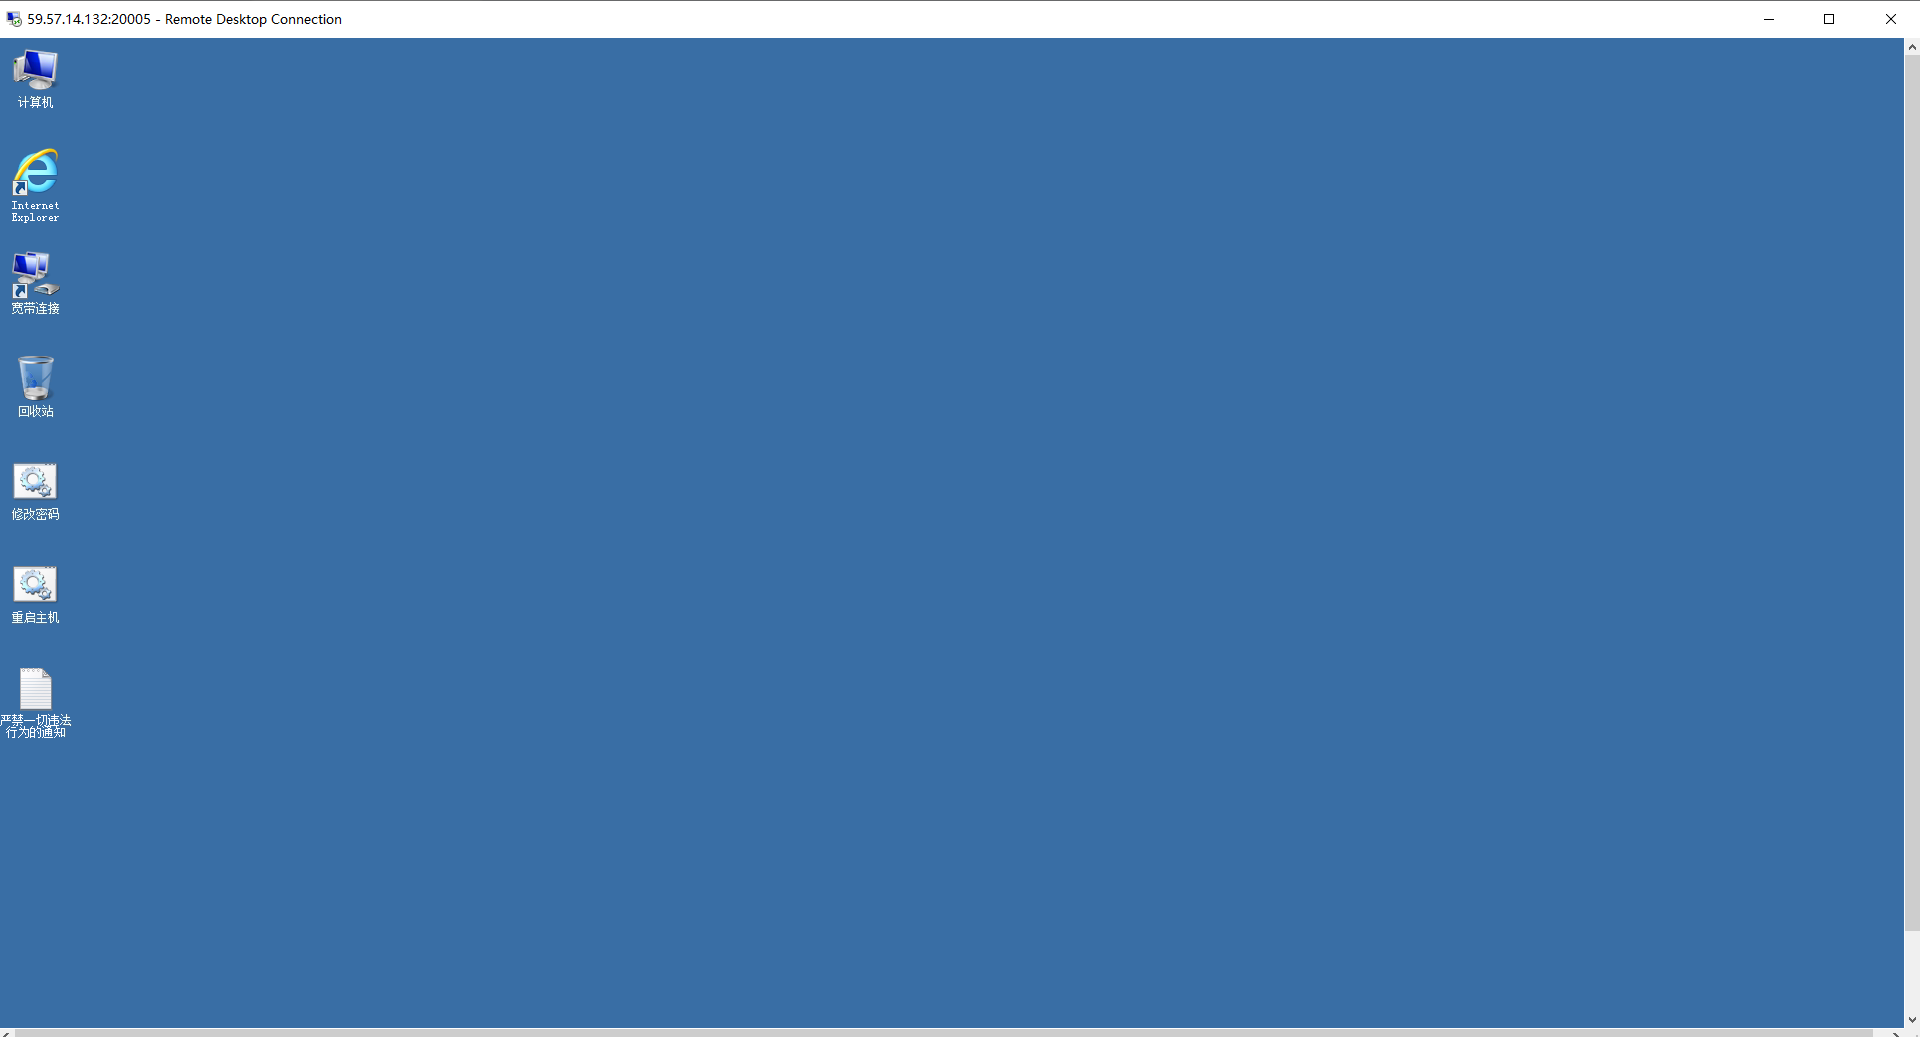
# 4. 常见问题
- 机器刚开通时,需要一定时间开机,请等待机器开机后,再尝试登录